 |
Pliny Workbench with WordHoard |
 |
3. Trying out Pliny and WordHoard together
One of the important ideas in this project was that Pliny should act not only as a notetaking application, but as an environment where other software packages could be integrated with it. In this way, Pliny becomes more like the “scholar’s workbench” (an idea often discussed within the DH community – although what has been meant by "scholar’s workbench" has varied considerably over the years) where tools, perhaps built by separate developers, can be assembled by the Pliny user. Pliny allows the user to assemble tools into a single, personal, framework, because the Eclipse foundation upon which Pliny is built supports this. This space in which separately written applications can exist and interact with each other, then, – which I am here calling the “Pliny workbench” – is not built with code that I have written, but instead exploits components of the Eclipse framework on which Pliny runs.
We could have packaged up Pliny code with the WordHoard code already incorporated into it, but this would have resulted in a piece of software which would not have taken advantage of Eclipse's ability to dynamically load a new application. Instead, think of WordHaord with Pliny as similar to what happens with Zotero. If you wish to use Zotero and you are already a Firefox user, than all you have to do is install Zotero into Firefox. If, however, you are not already a Firefox user, then you have two steps to do: first install Firefox, then install Zotero.
Thus, for people who wish to try Pliny/WordHoard together, there is – intentionally – a two stage process.
- First, you will need to install the version of Pliny that contains the base Pliny elements, but also incorporates the “workbench” component which supports the addition of new software by the user. This version of Pliny (identified as 1.2.0), as well as being already a full implementation of Pliny as it has existed in the past and that can be used on its own exactly as previous versions of Pliny supported, also contains code to allow other plugins to be added to it.
- Then, using the available workbench update mechanism provided in this version of Pliny, you need to install the WordHoard plugin.
Thus, a new 1.2.0 version of Pliny has been created to support the workbench idea, and it incorporates Eclipse’s own provisioning manager p2 in with Pliny’s other components. It this provisioning manager that, when invoked, allows the Pliny user to add new components such as our experimental WordHoard application.
Installing Pliny version 1.2.0 is essentially the same as it was for earlier version of Pliny, and -- like earlier versions -- is somewhat different on the Macintosh than it is on Windows machines. See instructions for this here.
Adding WordHoard into the workbench
Having now installed Pliny, and, perhaps having used it for a while on its own, you might be ready to add the WordHoard component into the Pliny workbench.
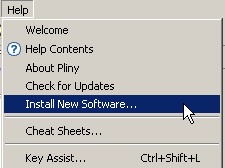
- Begin the process by choosing Install New Software from
Pliny 1.2.0's Help menu:
- The following Available Software window will appear:
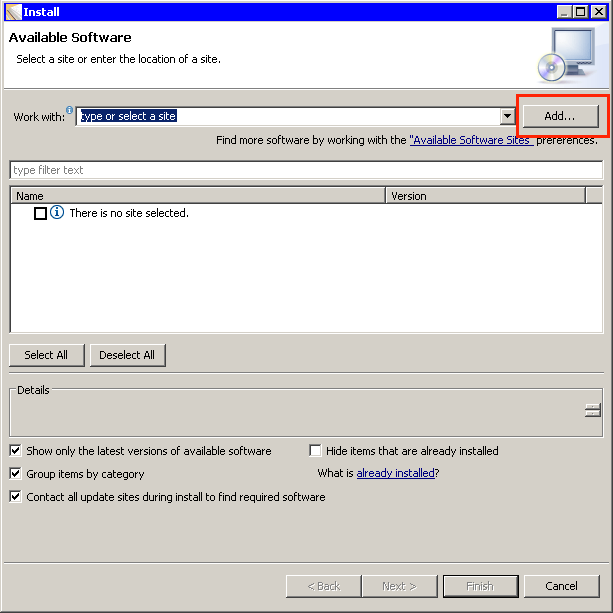
- Now, you must tell Pliny where the repository is that holds
WordHoard. You do this by adding a repository for WordHoard. Click on
the “Add…” button (highlighted with the red box in the figure above). The Add
Repository box will appear. Fill in its two fields as is shown below:
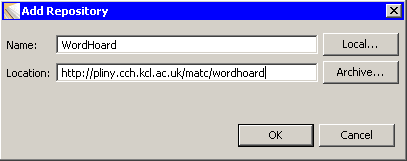
- The Add Repository box will disappear, and a new WordHoard
repository entry will appear in the central area. Check the tickbox beside the
name of the WordHoard component to select it, as shown here:
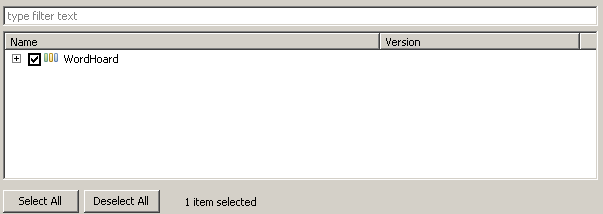
.. and then click on the Next button at the bottom of the Available Software window.
- The Install Details window will appear showing that you
are in the process of installing the WordHoard feature. If you (optionally)
highlight the feature entry a brief description of it will appear in the Detail
field.
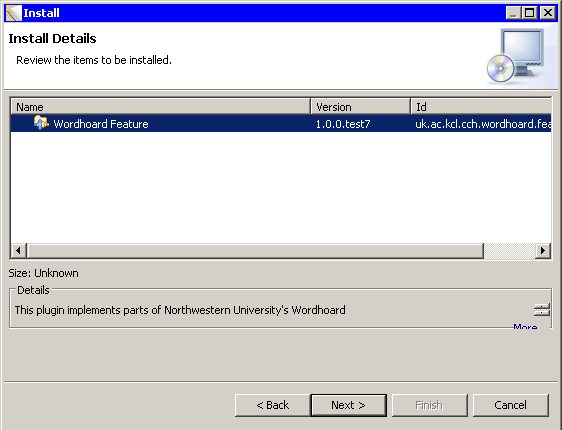
... click on the Next button to continue.
- The Review Licenses screen will appear. You must accept
the licenses under which the software is made available to you by clicking on
the I accept … radio button, as shown here:
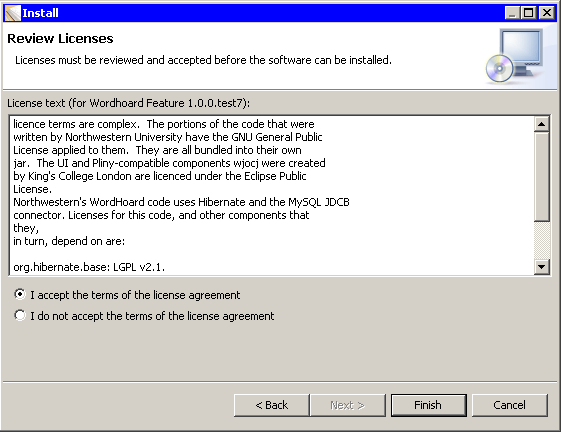
- Now click on the Finish button.
- As the components are installed into your copy of Pliny you may
see the following prompt:
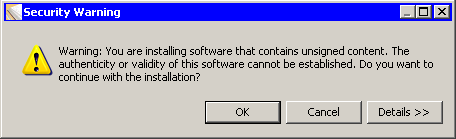
If this box appears, click on OK.
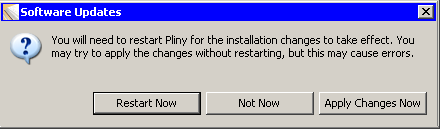
- Finally, when all the software has been set up, Pliny will want
to restart. Click on Restart Now:
When Pliny restarts the WordHoard component will be available
Starting WordHoard in Pliny
After Pliny has restarted, it will be co-existing in the workbench with WordHoard. You will see a new menu item "Wordhoard", and WordHoard’s Table of Contents display button will have appeared in Pliny's main toolbar area:

This is a sign that WordHoard is now available. Click on the WordHoard Table of Contents display button, and the Table of Contents will appear:
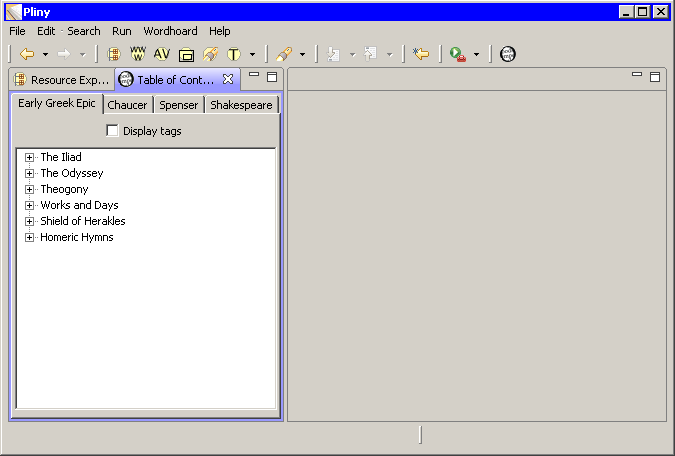
The Table of Contents may place itself somewhere else in the Pliny Window. I like having it share the pane with Pliny's Resource Explorer. If that suits you too, you can place it in the Resource Explorer's pane by dragging the tab attached to the Table of Contents and dropping it over the Resource Exploerer's tab for Pliny's resource. After they share the same pane, note that you can switch between them by selecting between the two tabs that will then be presented at the top of their shared containing pane.
Not all of WordHoard has been implemented at this time, but the components that are there operate in ways very similar to how the corresponding parts work in standard WordHoard -- although here and there there are changes to accommodate the Pliny/Eclipse way of doing user interfaces. If you have not used standard WoardHoard, there is help about how to use it in the WordHoard section which appears in the help screen launched by the Help / Help Contents menu.
John Bradley
Center for Computing in the Humanities
King's College London